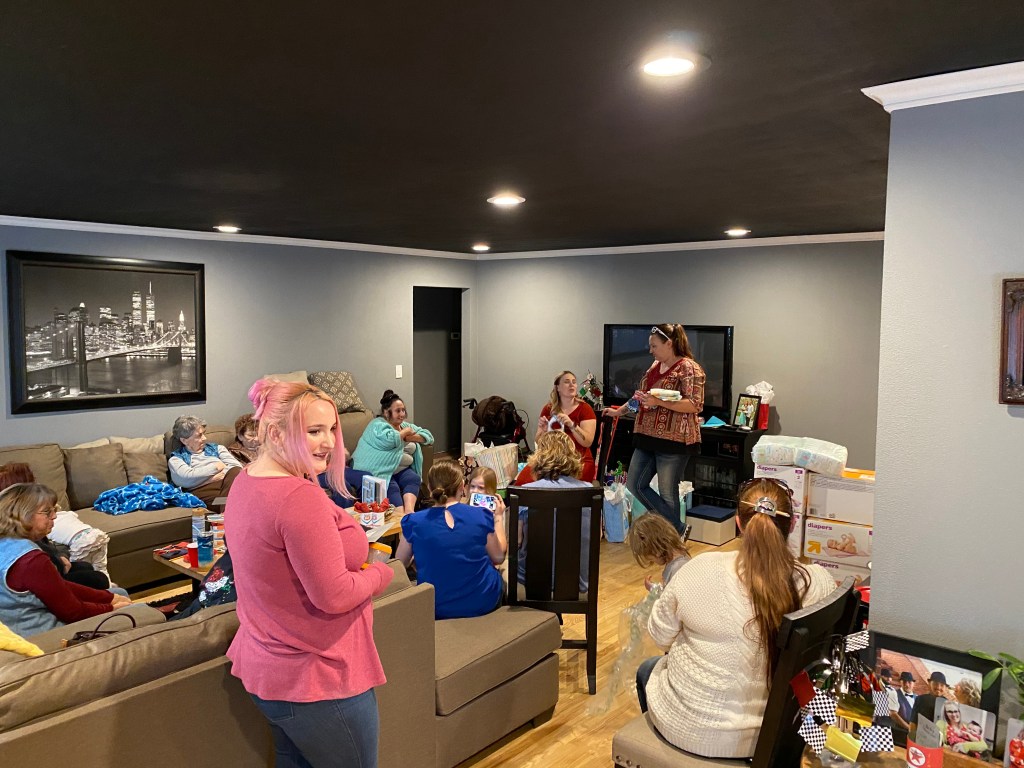
As promised here’s all about our baby shower! Since this is our second born child and the boy to follow our girl I figure this will be the last baby shower I get to throw so I knew I wanted to do it “big” and that’s exactly what I did.
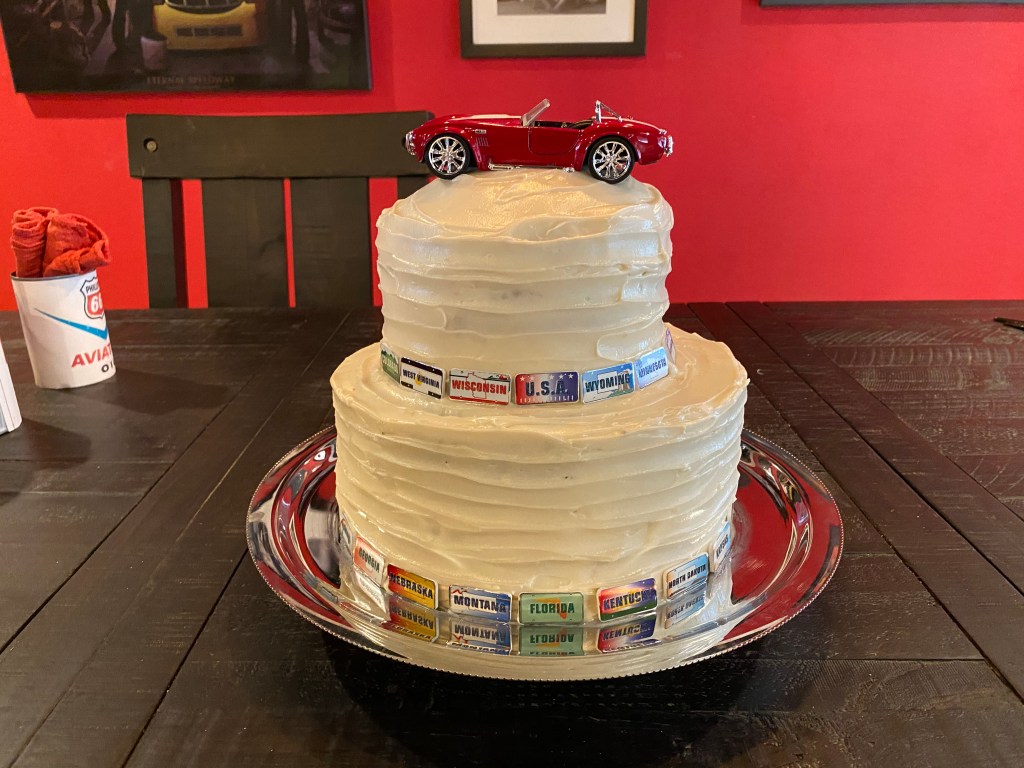
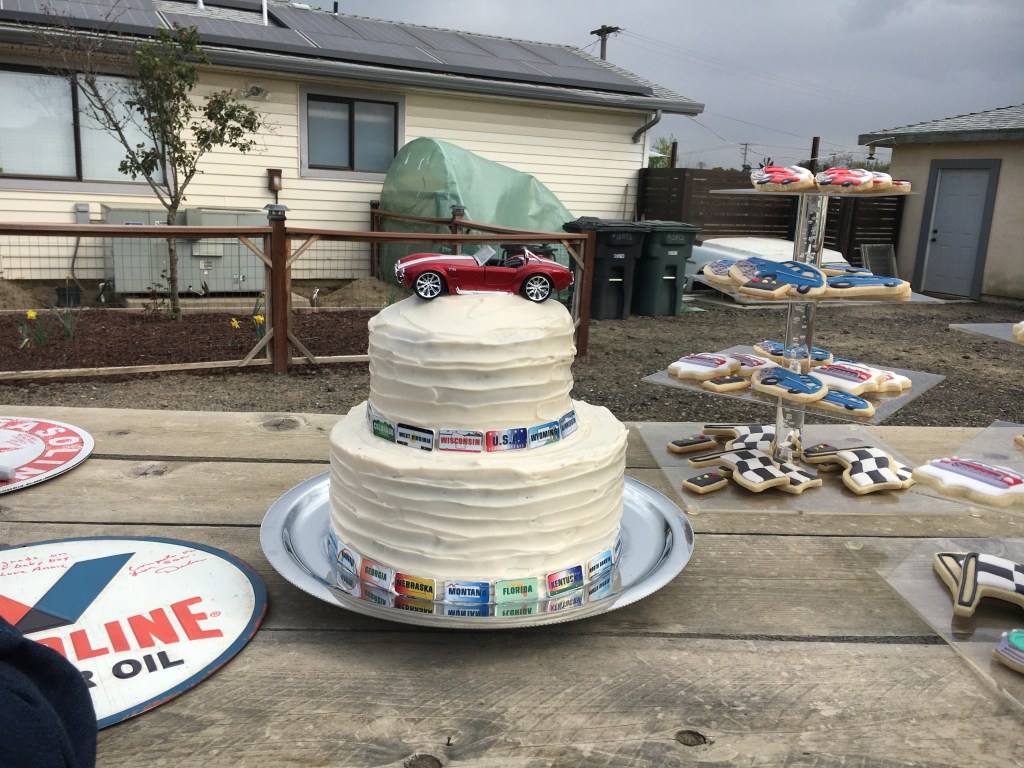
There are so many details that my husband and I put together so this may be a bit lengthy. It will also have a lot of pictures. We’ll start with the cake first. This adorable cake was inspired by a picture I found on Pinterest. My mother in law makes cakes so we asked her if she’d do it. I wanted to have her make it and not have anyone buy it because I love when someone hand makes something for someone. It’s like you can feel the love in the item when it’s made and not bought. The end product was exactly what I had hoped for and it was super tasty!
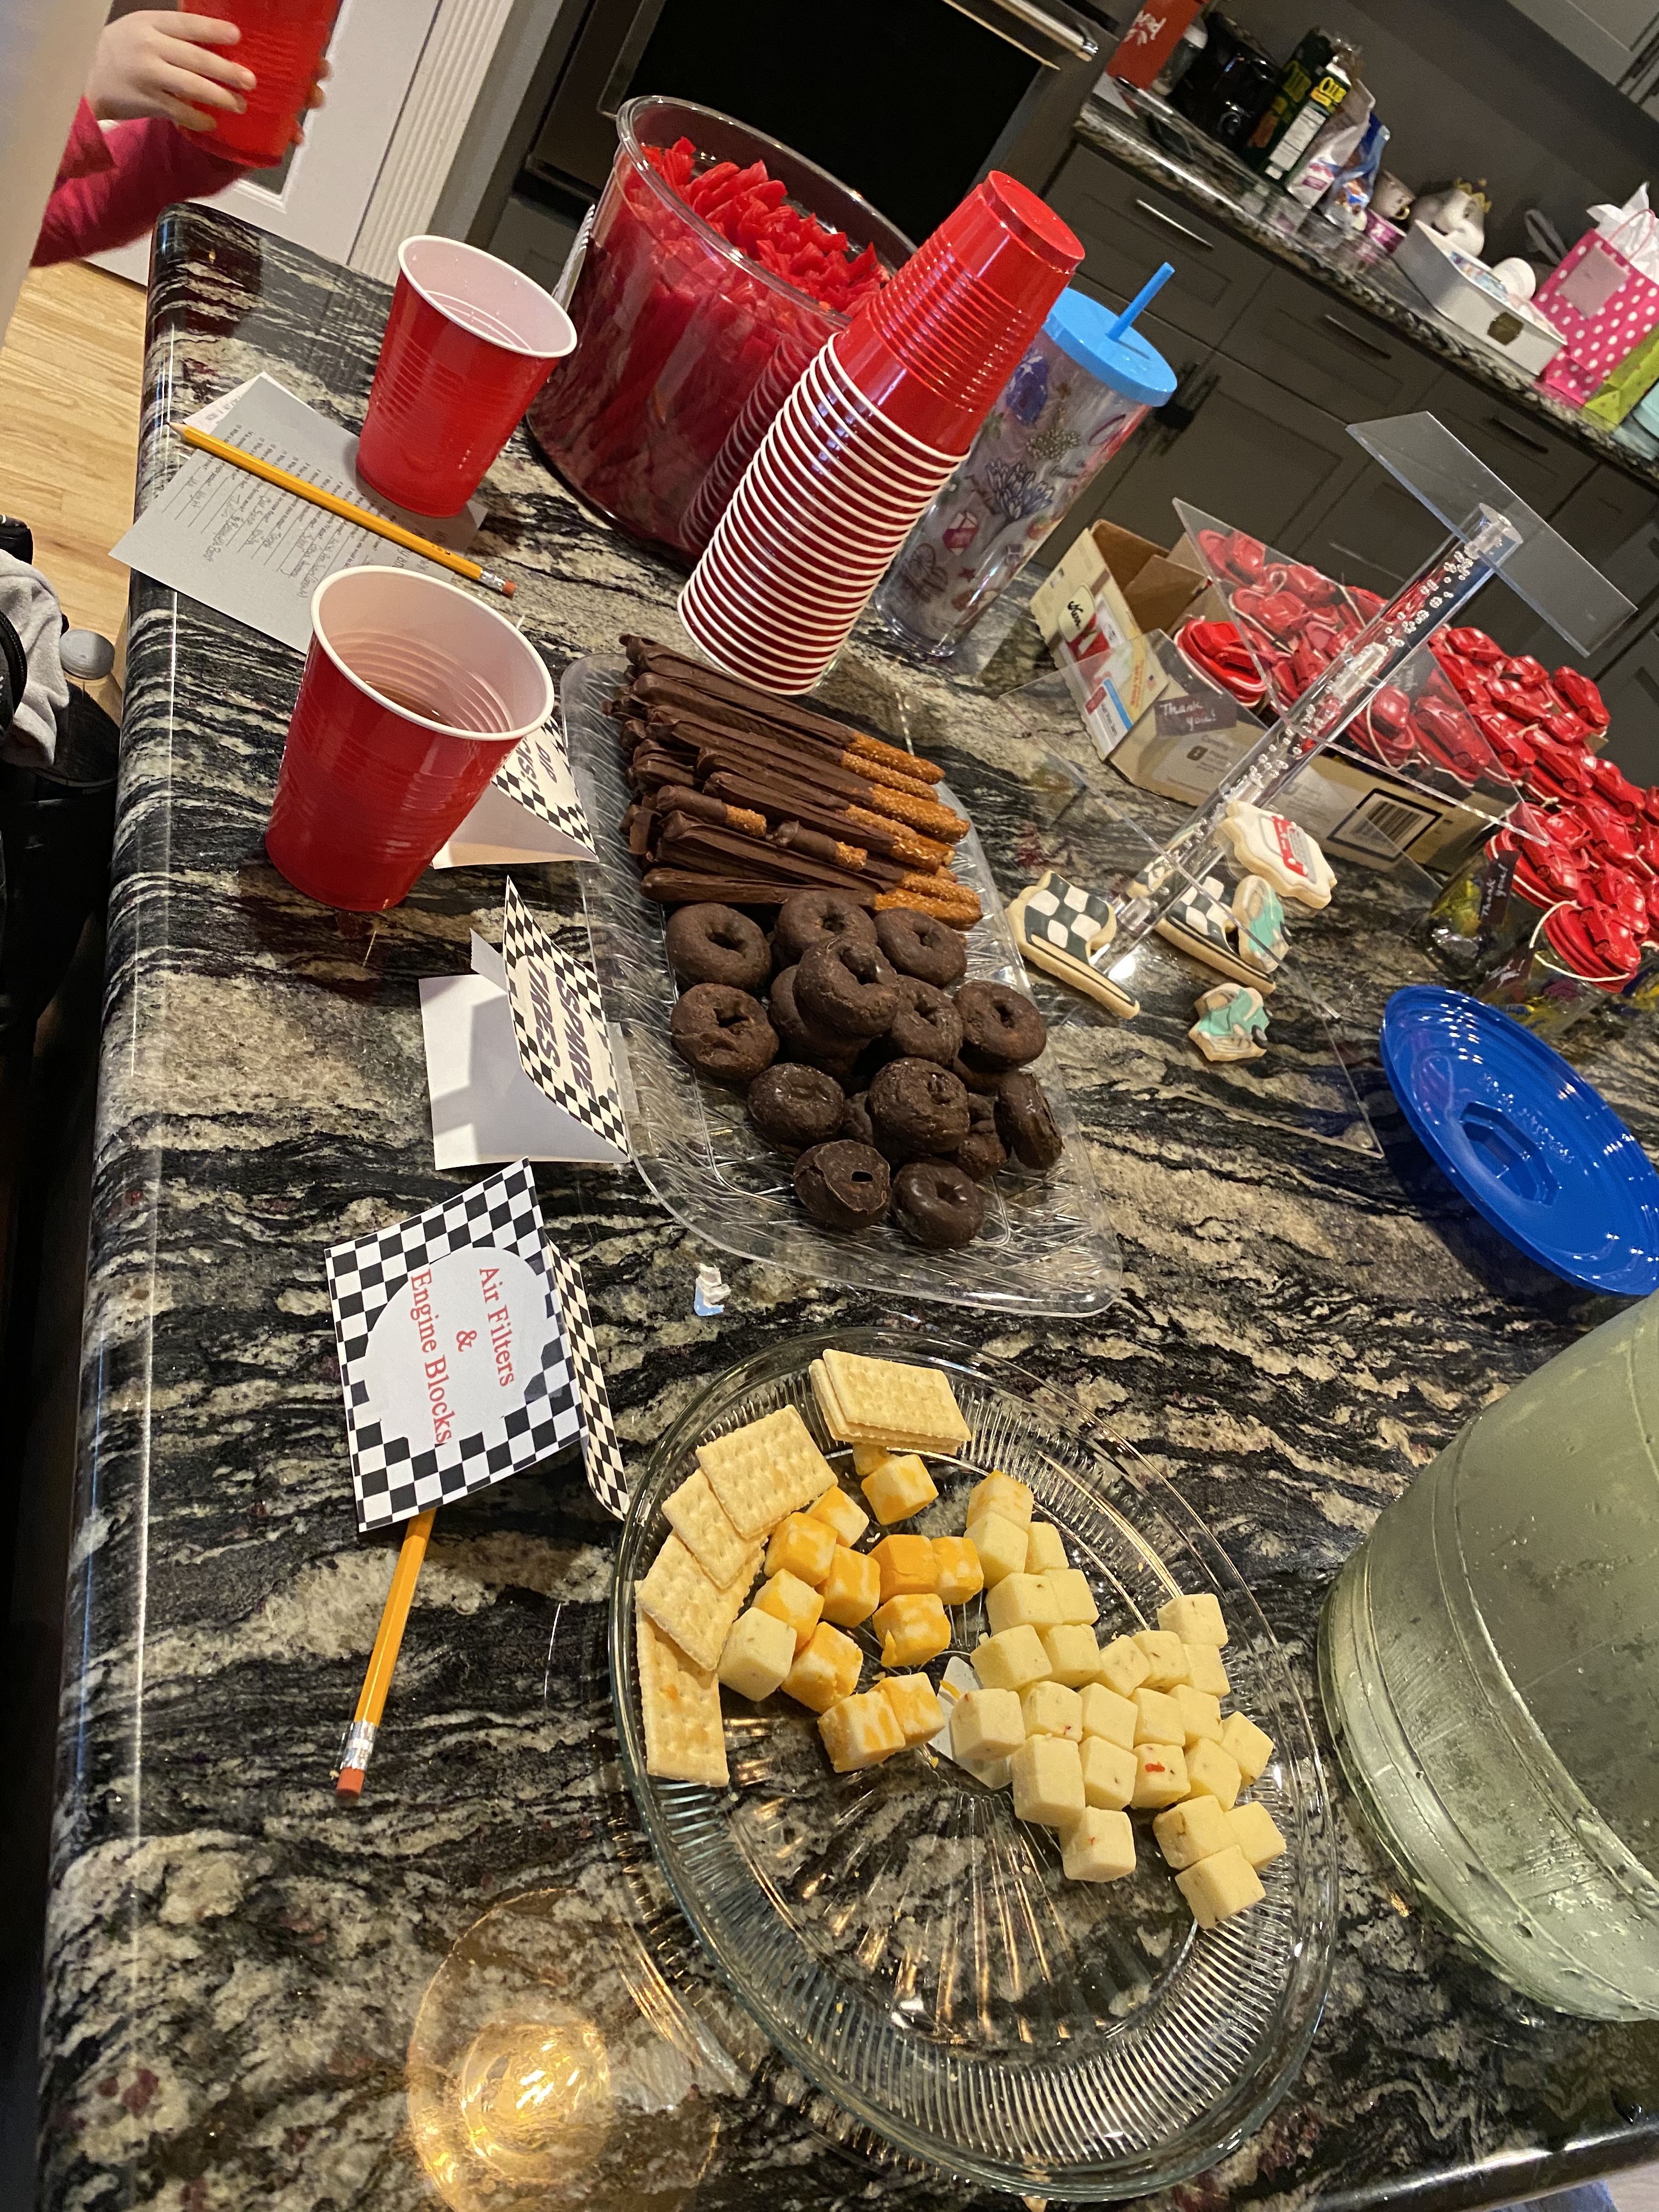
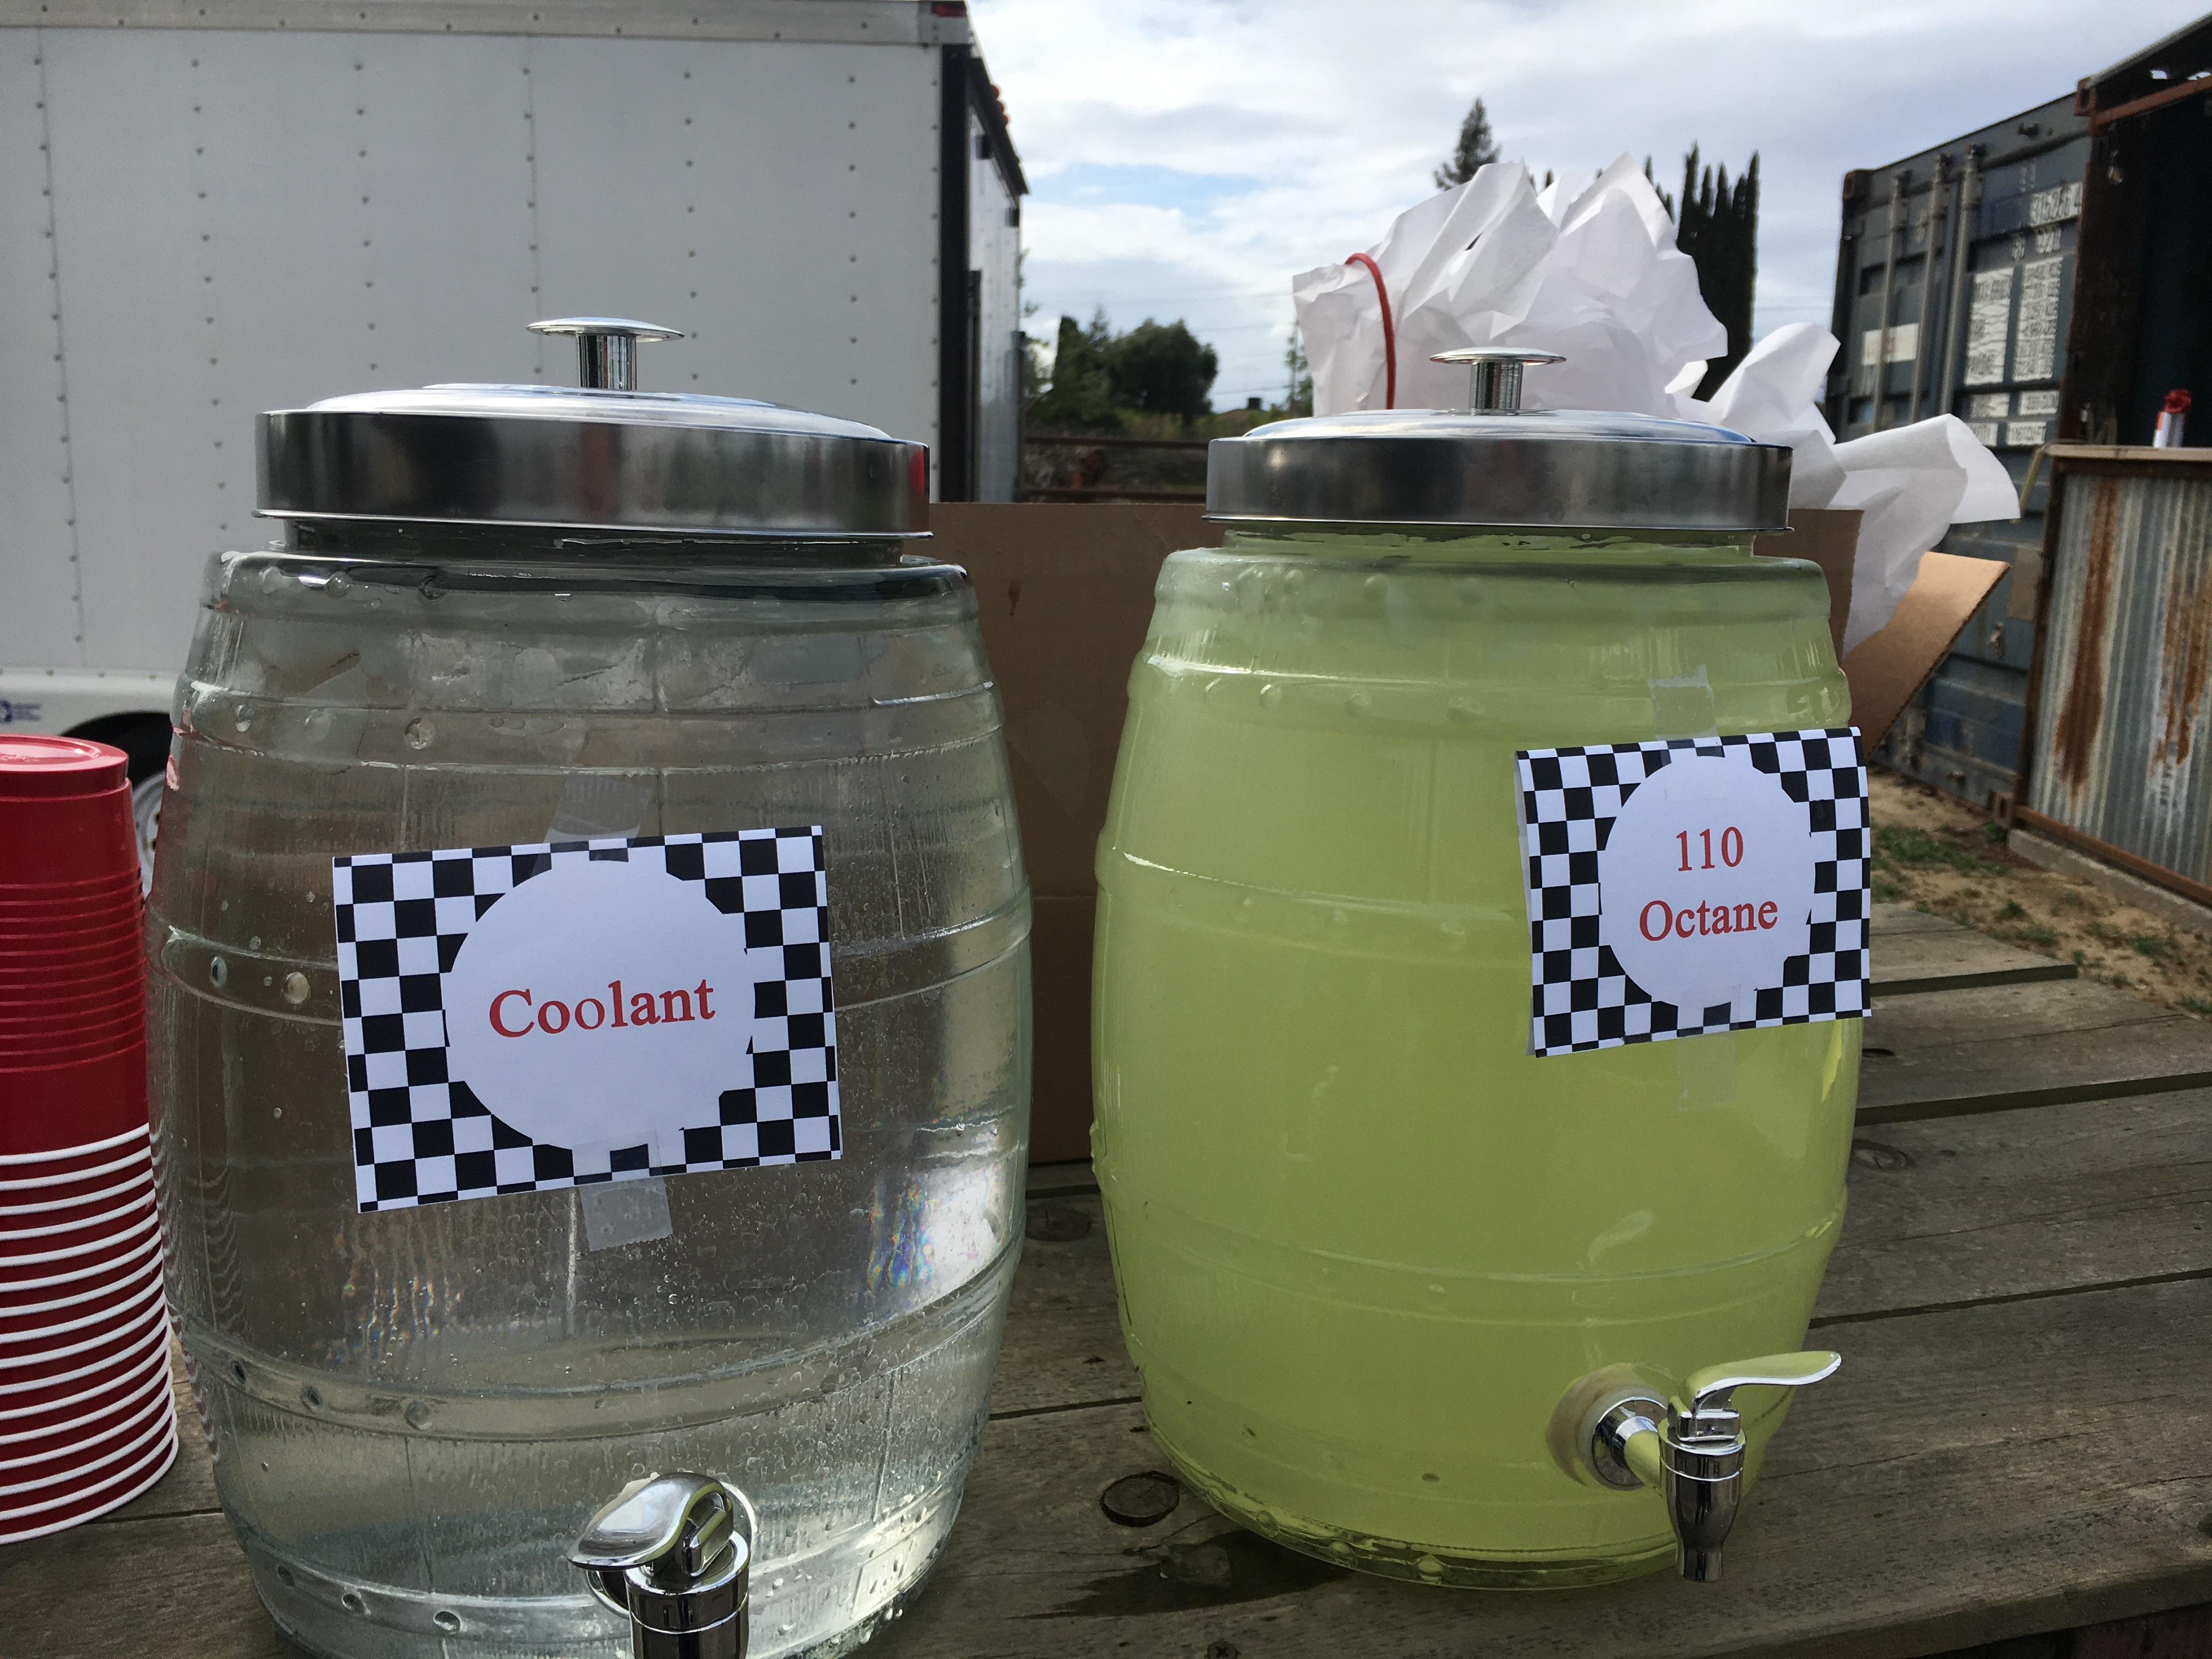
I also found a post on Pinterest that talked about having foods that could be named after automotive things. We had the shower at 3pm so we decided to have snacks as opposed to a meal. That kept it cheaper as well as easier to do the automotive food names. Here’s a list of what we had:
- Redvines= “jumper cables”
- Aram sandwiches= “steering wheels”
- Mini donuts= “spare tires”
- Chocolate dipped pretzels = “dip sticks”
- Cheese cubes= “engine blocks”
- Club crackers= “air filters”
- Trail mix= “nuts and bolts”
- Water= “coolant”
- Lemonade= “110 Octane”
- Sweet tea= “fuel”
- Chips and salsa
- Cake
- Cookies
I printed little checkered tags with the fun titles of the food and drinks to add to the automotive theme

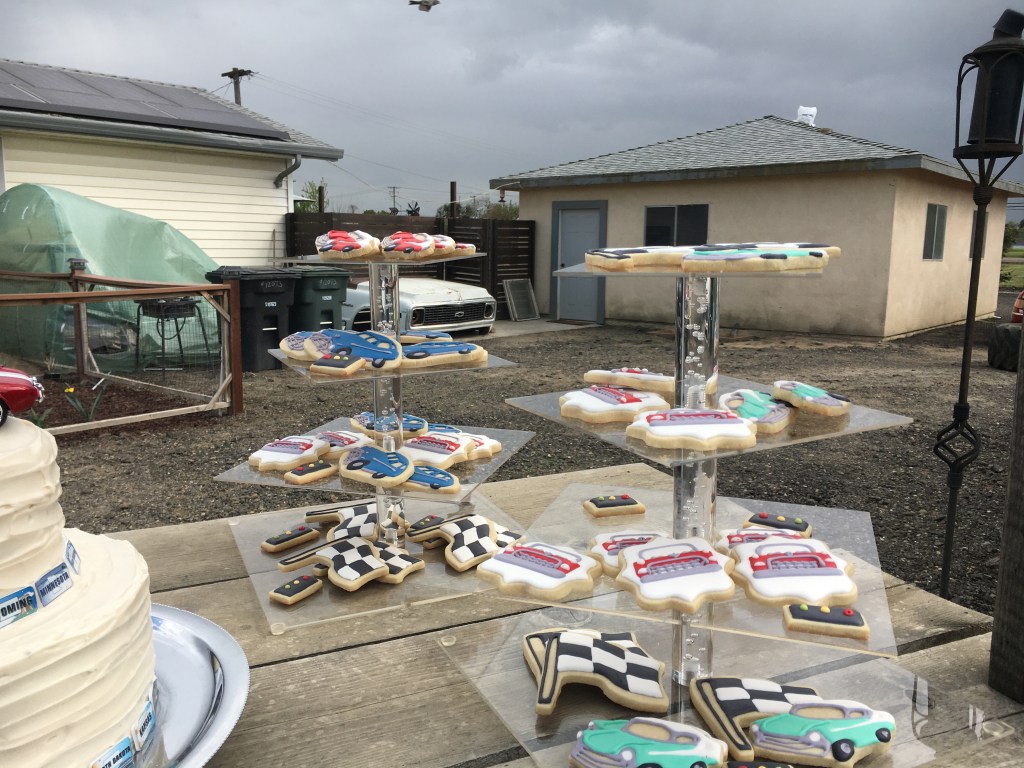
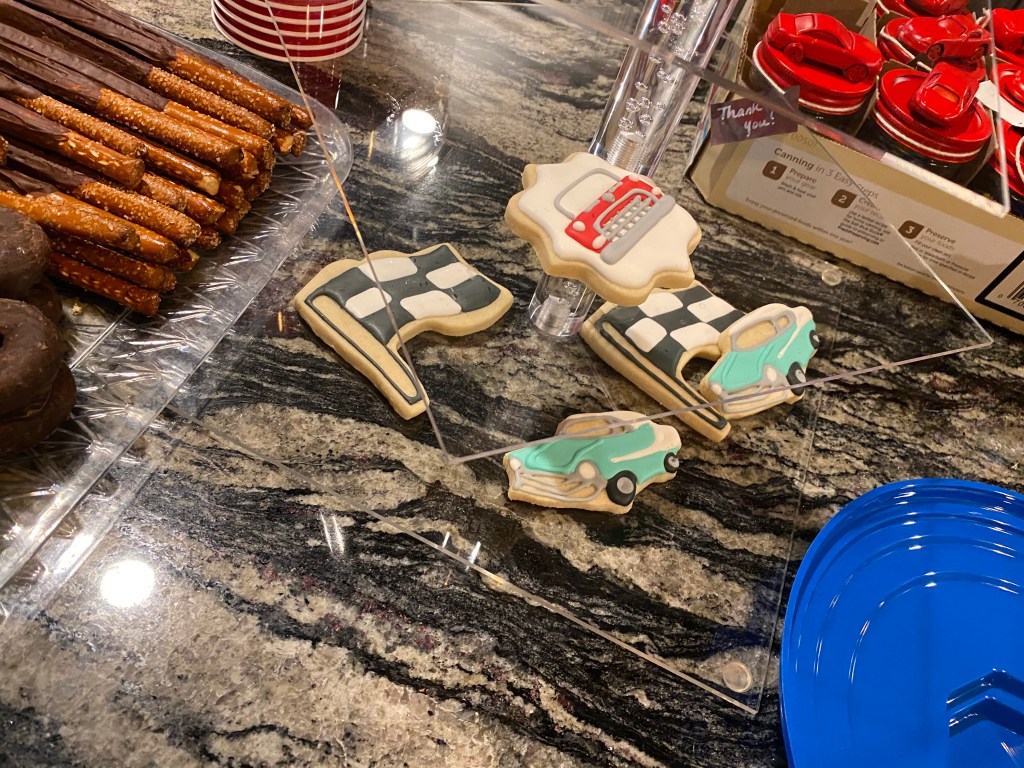
As for the cookies, I asked my mother to make those since she runs a cookie business ( which you can find here https://www.facebook.com/mrscustom.cookies ). She went above and beyond. She did some of the car cookies to match the invitation, some to represent a car my grandfather use to own, some that represent Doc Hudson from Disney’s movie Cars (I’m a huge Disney fan), as well as racing flags and signal lights.
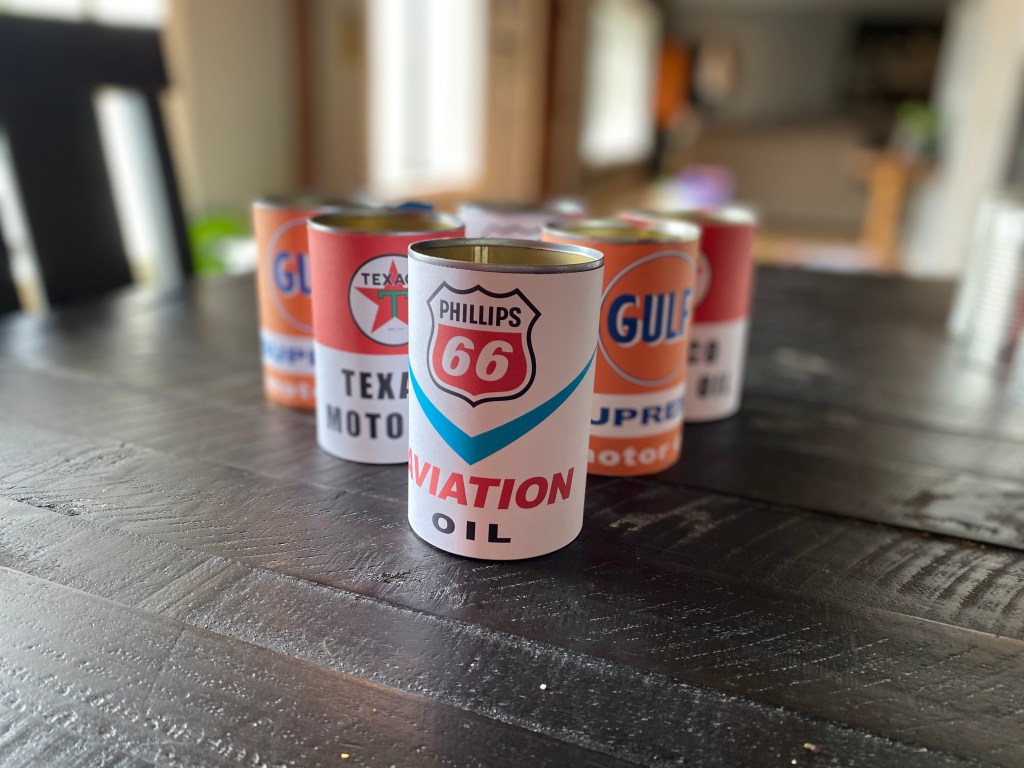
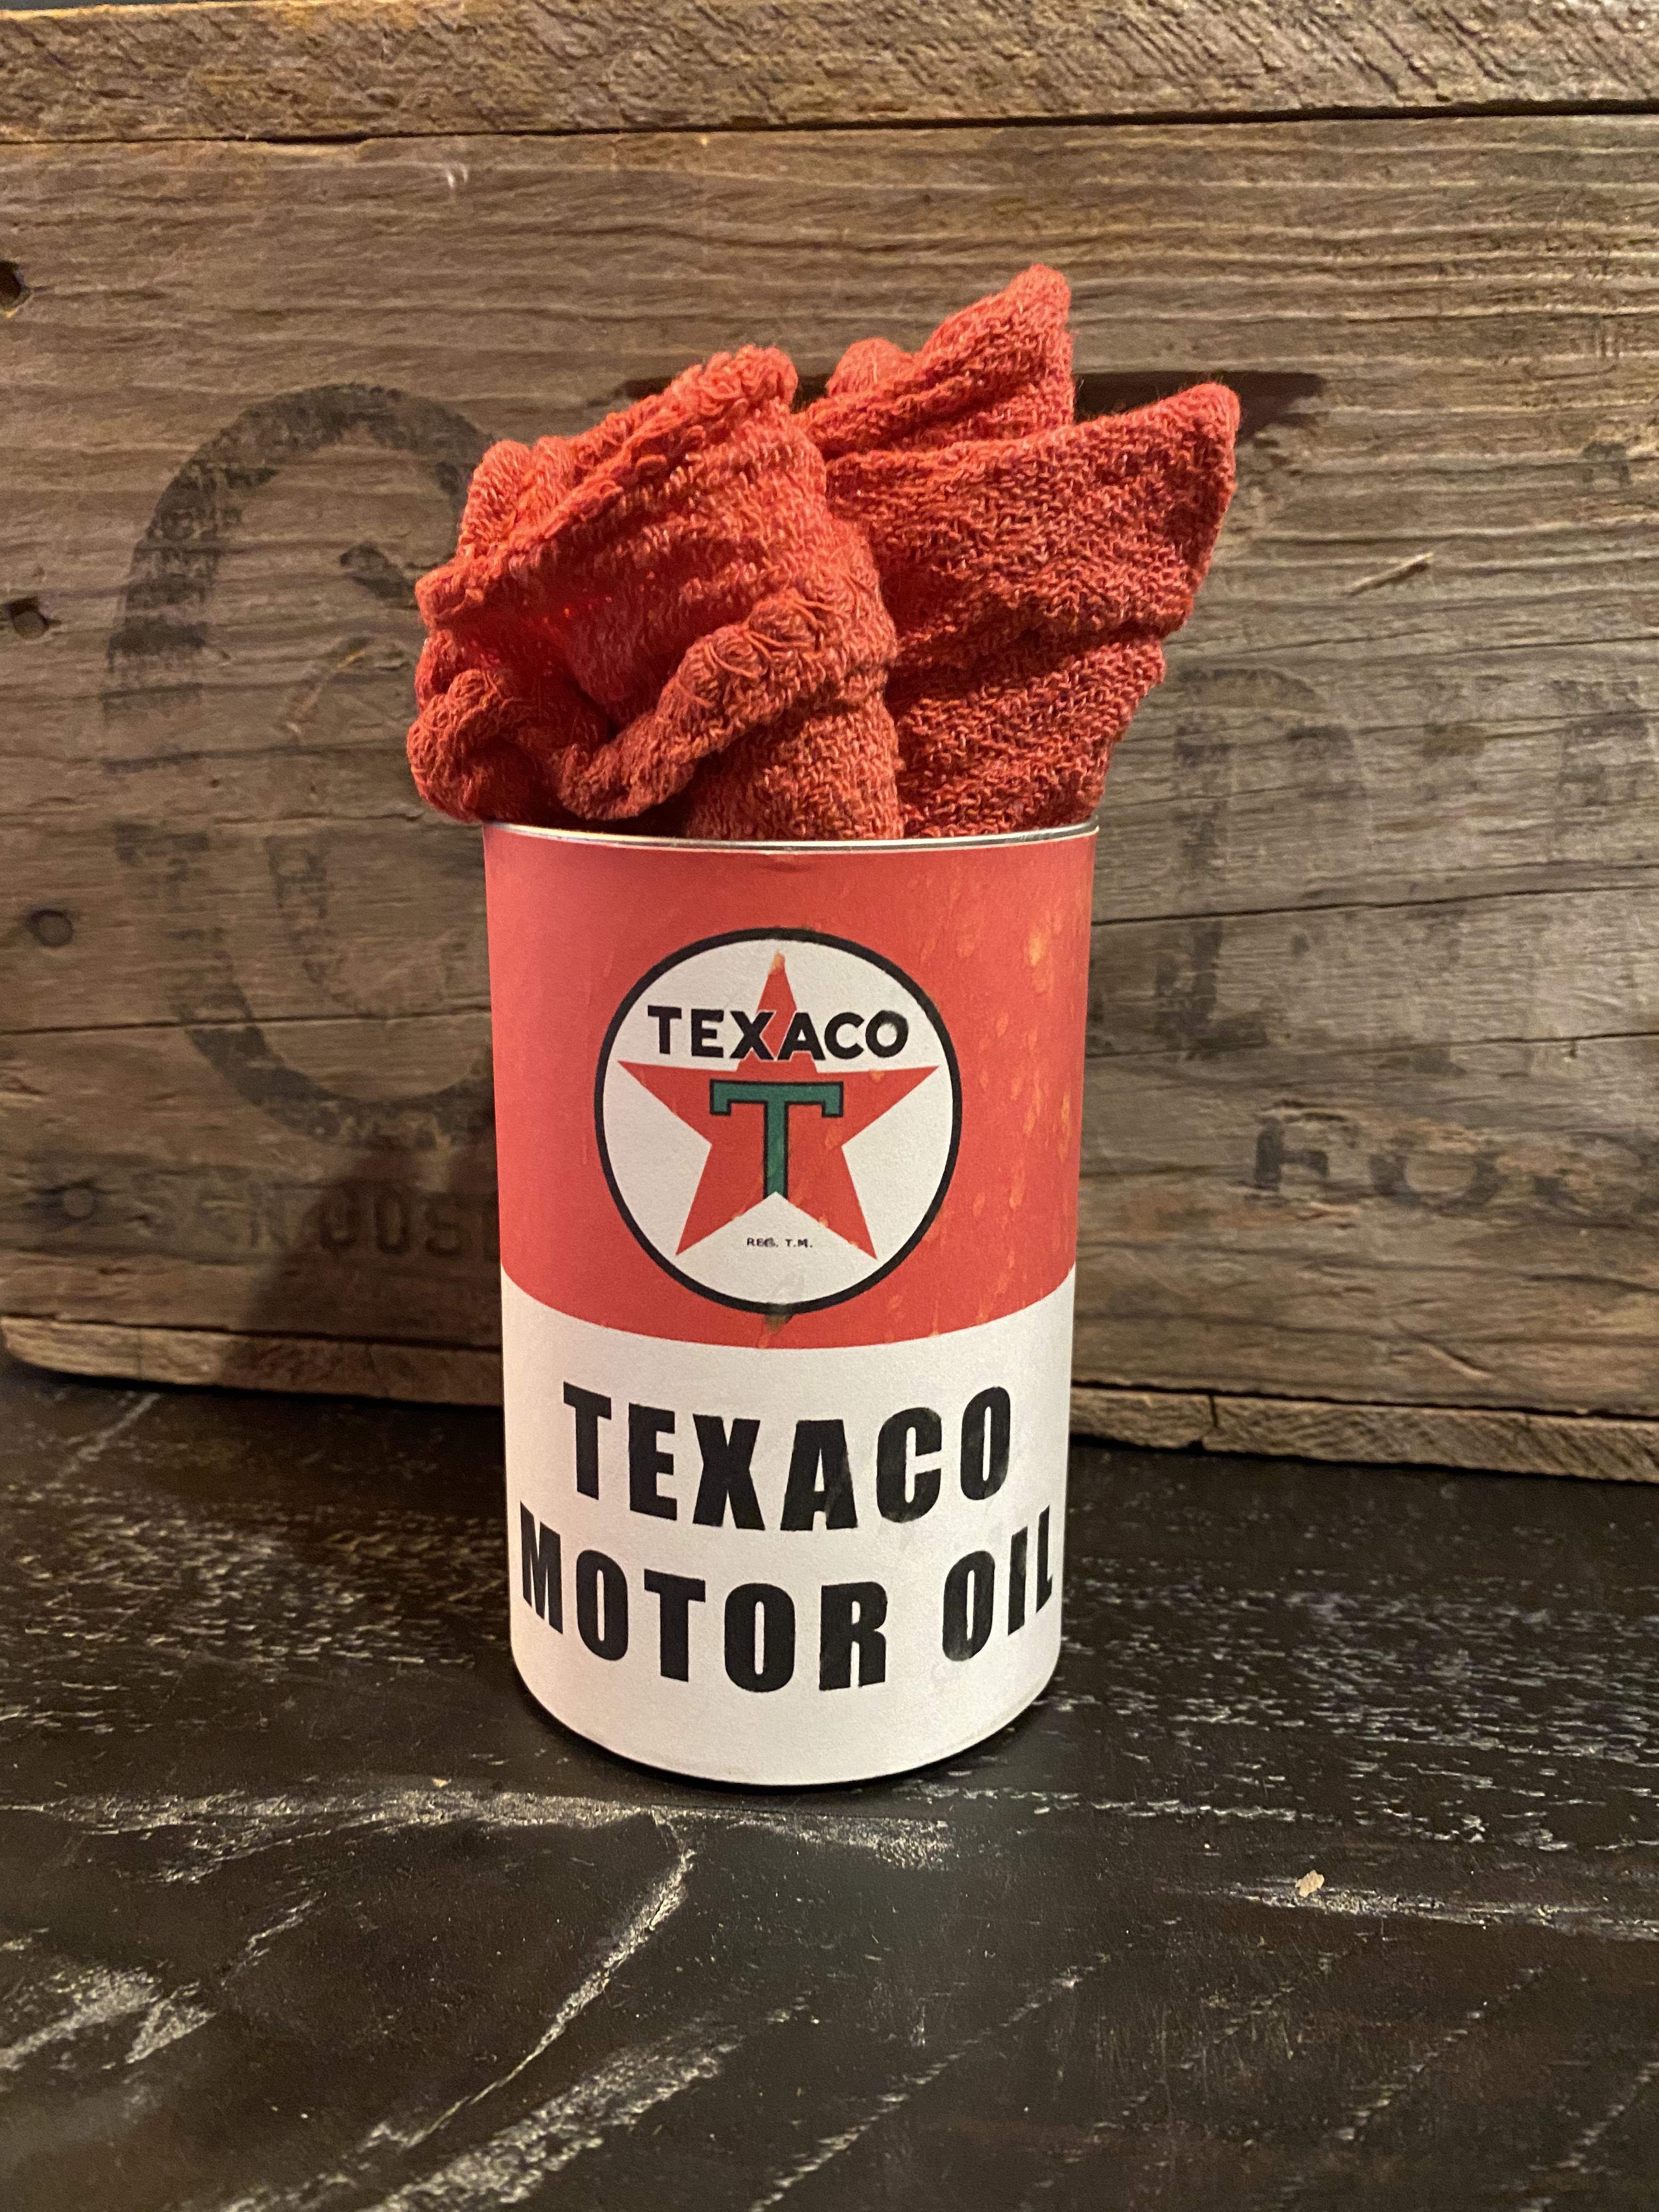
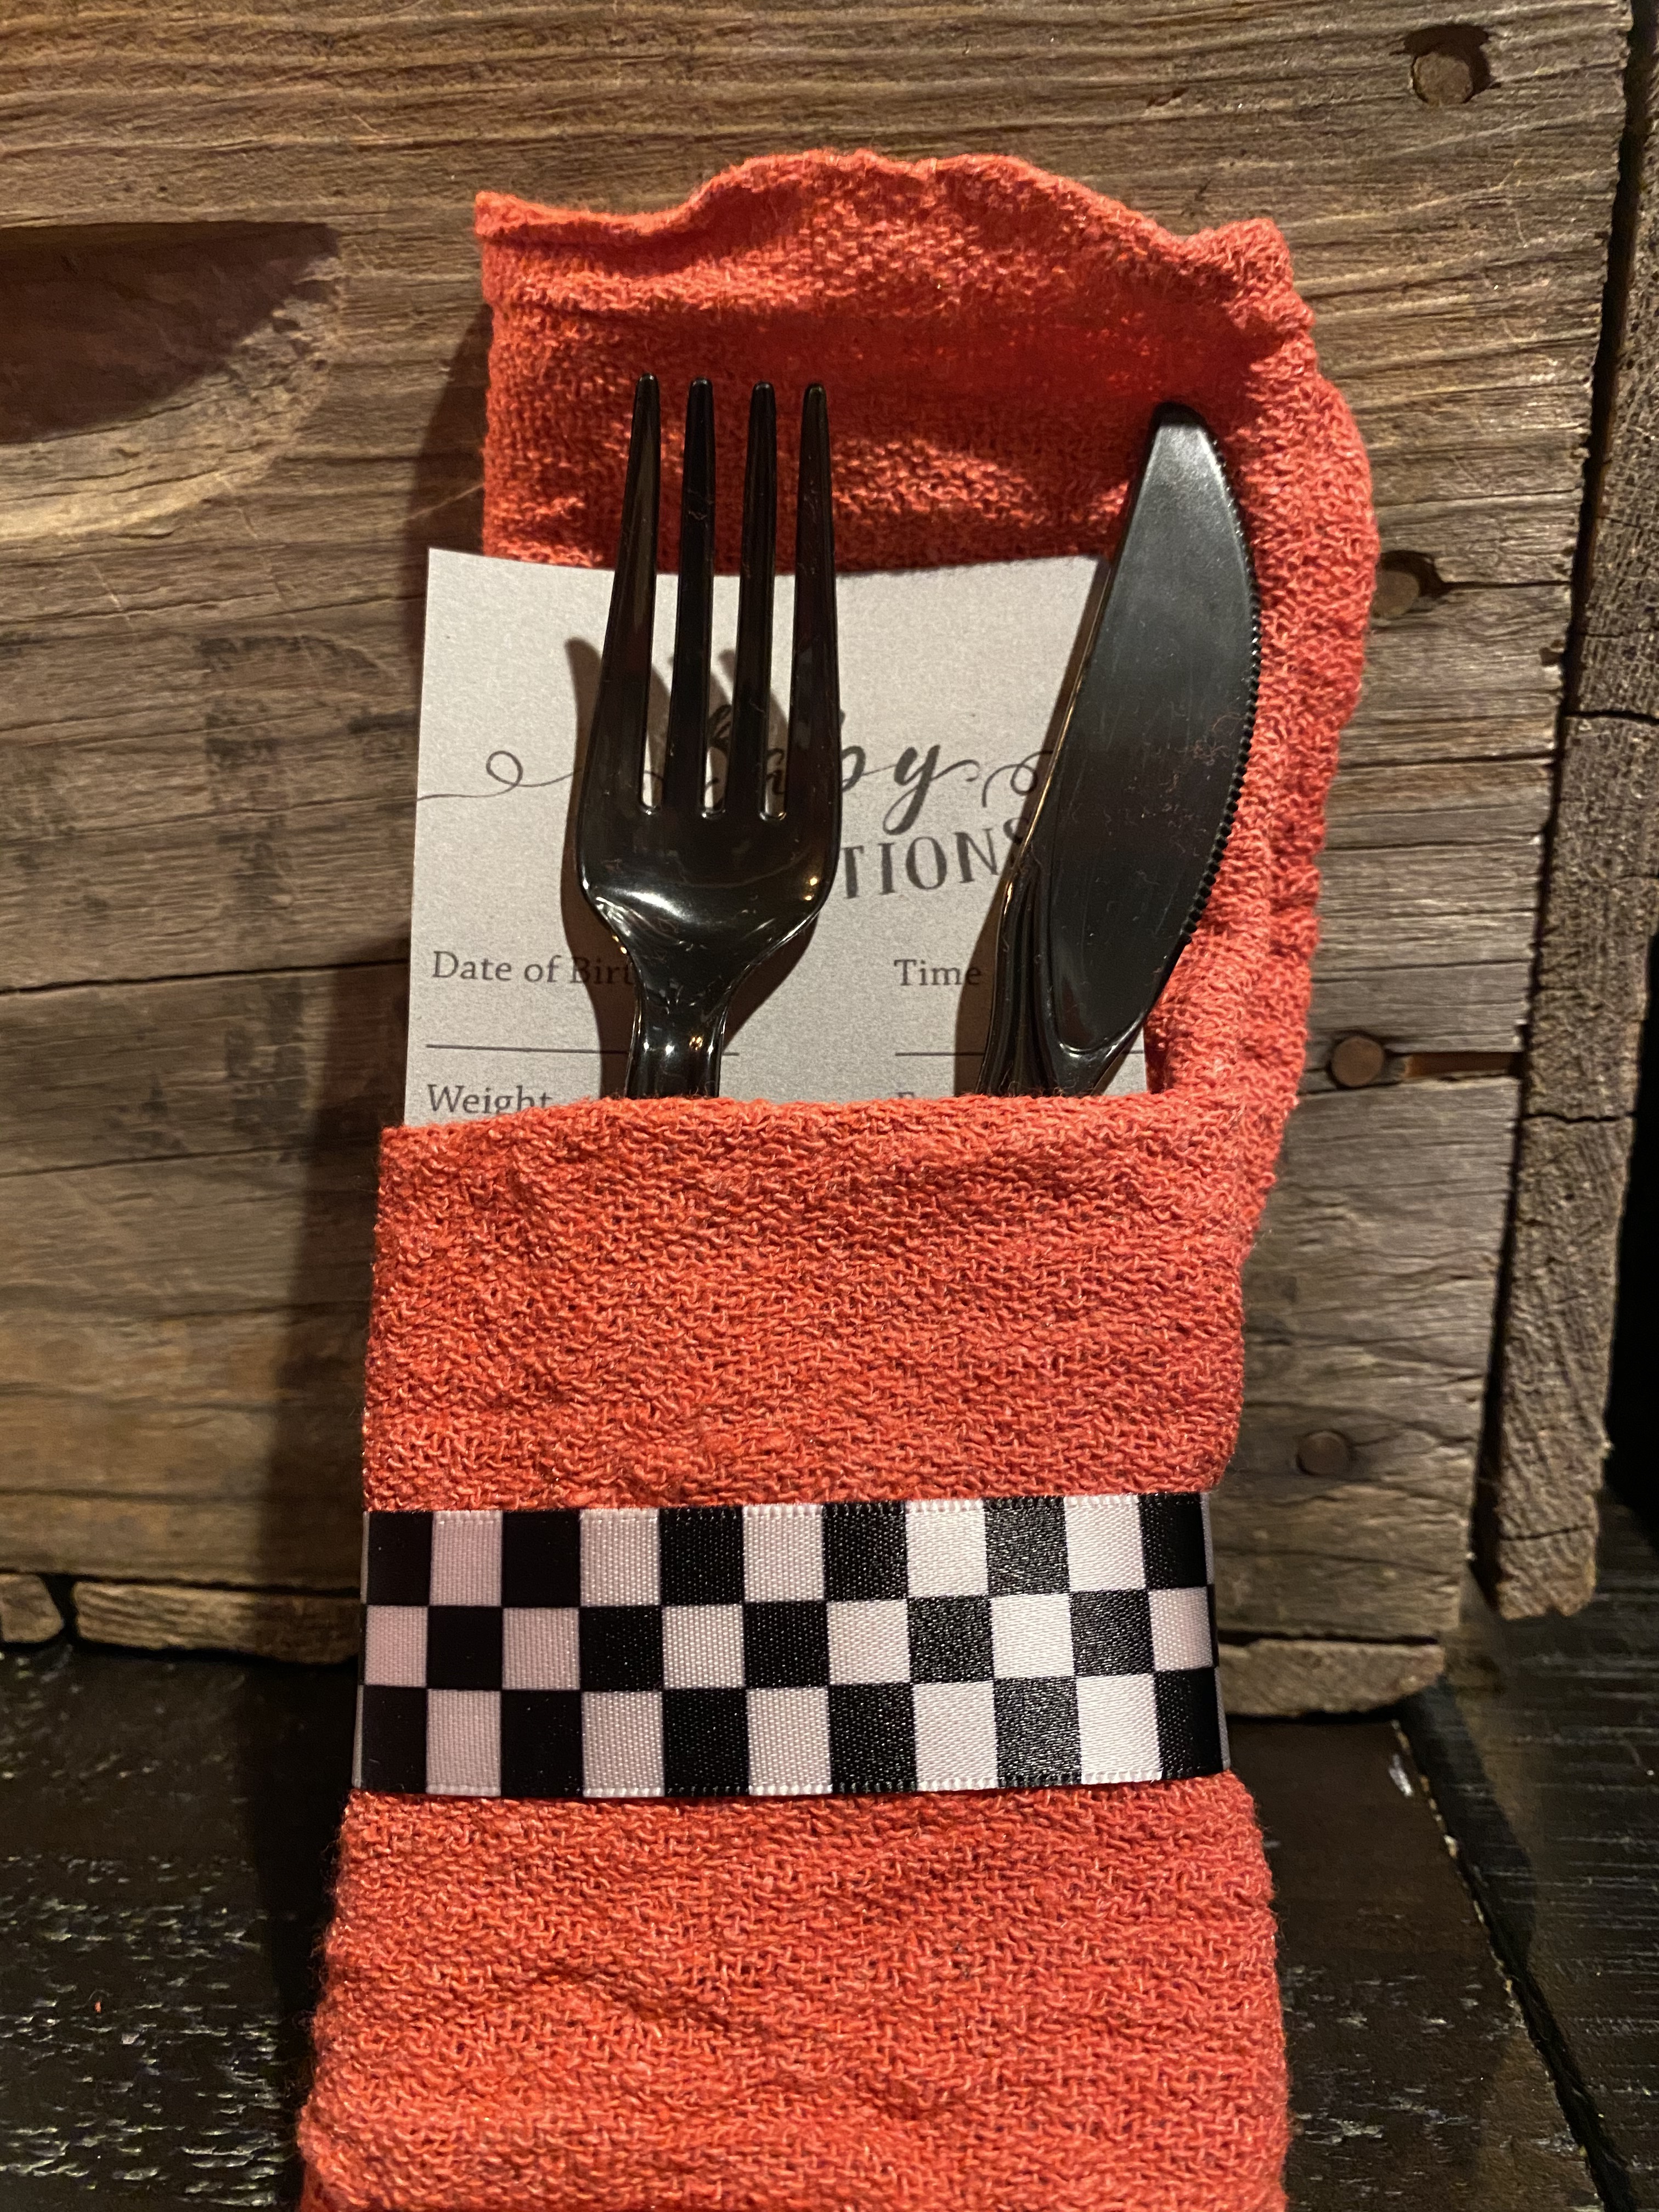
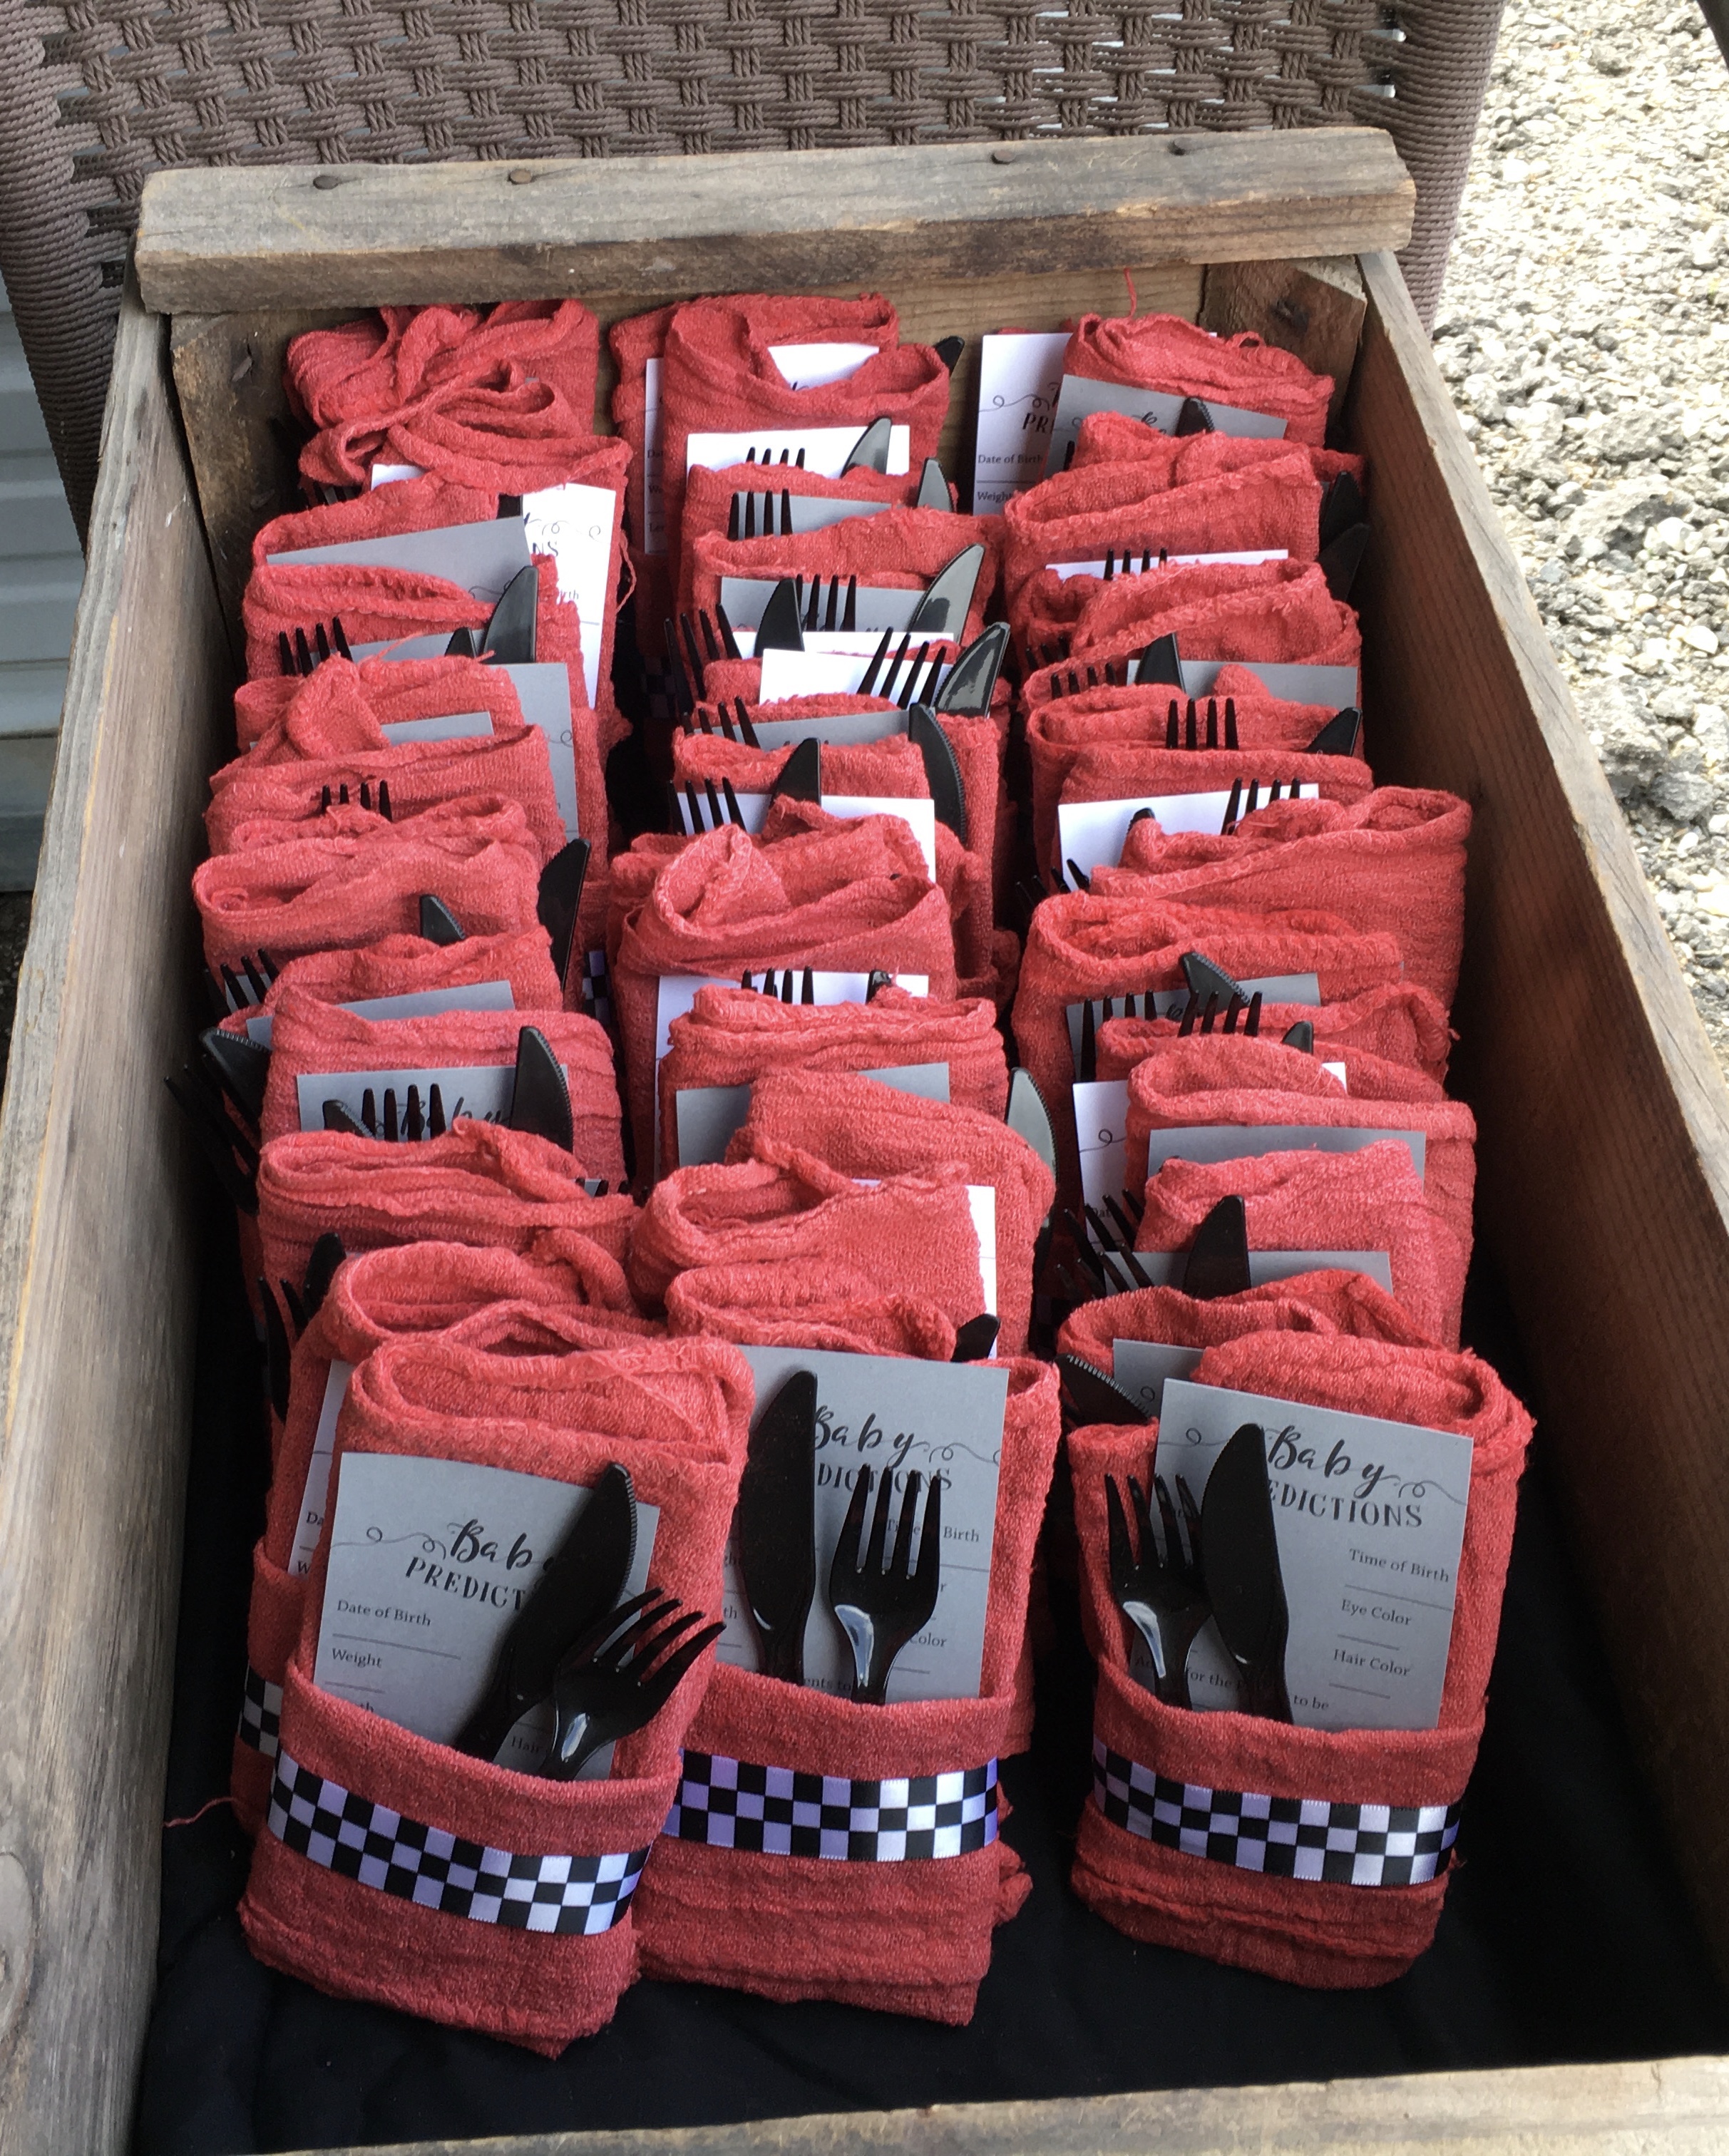
For the utensils I just ordered some black plastic utensils from Party City and wrapped them in shop rags that we ordered from Amazon. I then placed a checkered ribbon around it to add some more of the automotive theme. I then decided to stick a baby predictions card behind the utensils. I got the card as a free printable from Pinterest and printed it on card stock at home. I also found a free printable that looked like old oil cans on Pinterest. I printed those on card stock at home as well then put them on empty, washed vegetable cans and put extra “napkins” in them and set them out around the party (we used the shop rags as napkins).

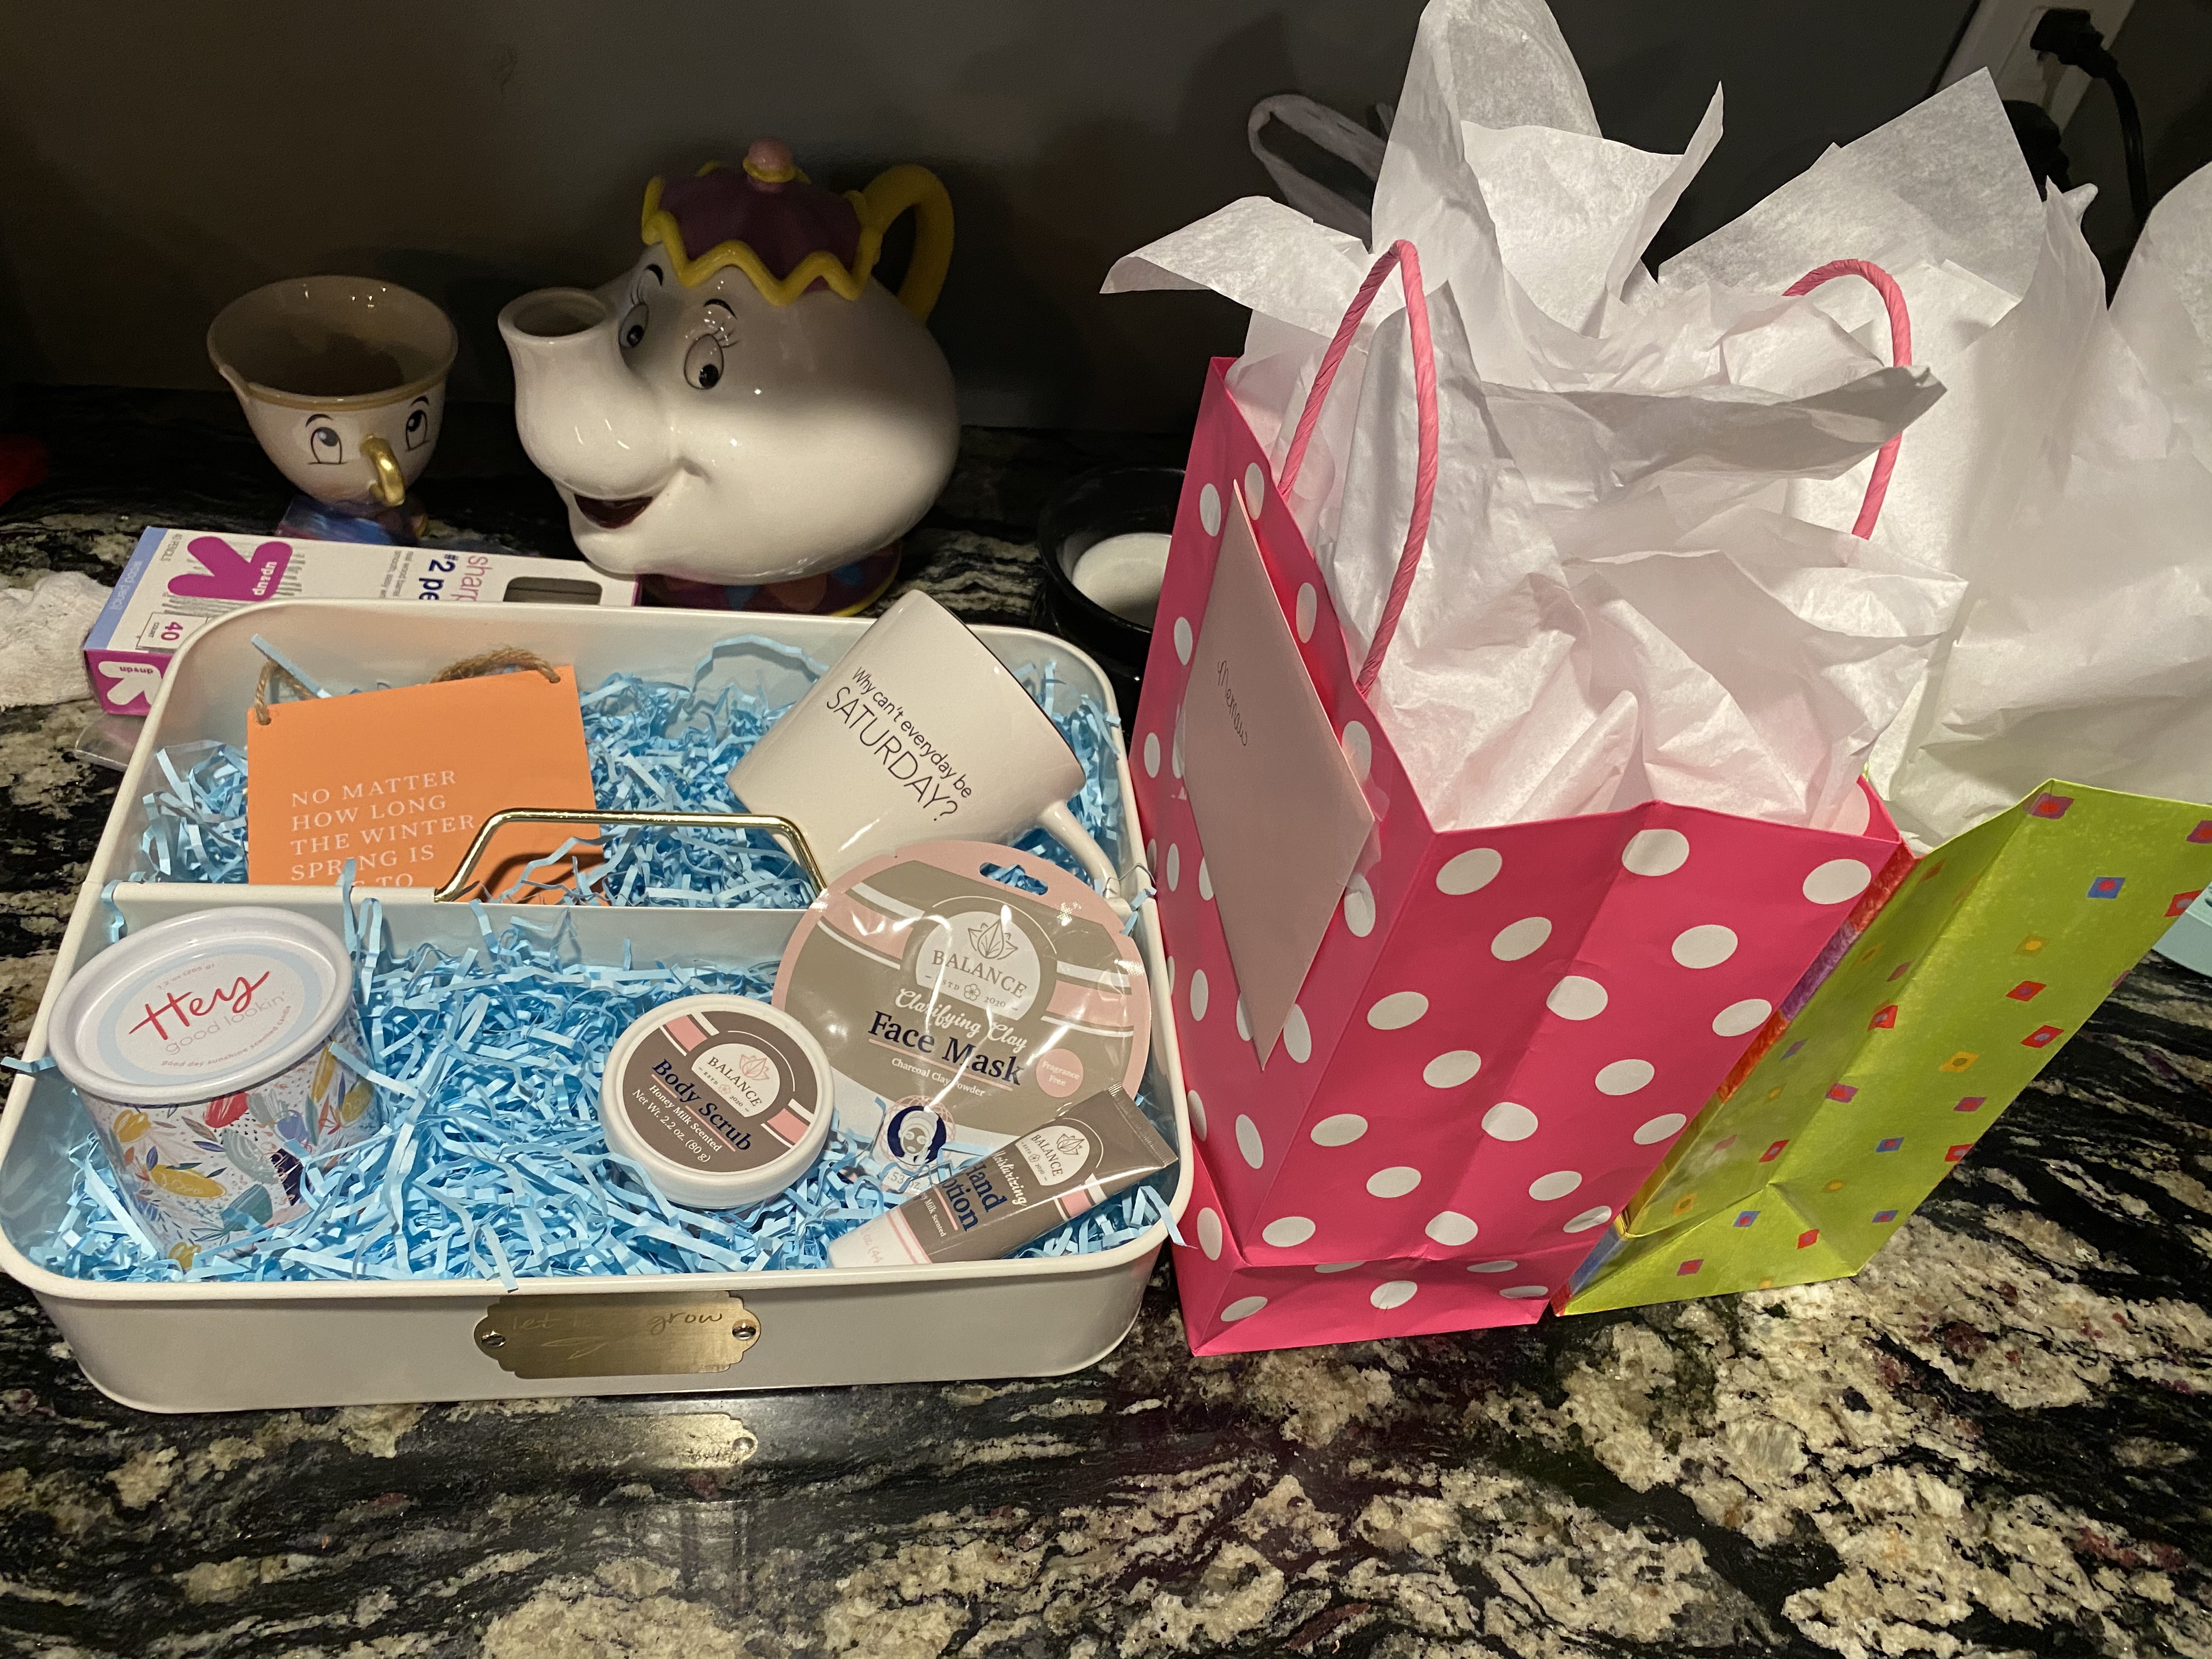
As far as games, we kept it pretty simple. We didn’t play any games at our daughter’s baby shower so I decided I wanted some at our son’s baby shower. I picked a “who knows mommy and daddy better”, match the Disney parents to their kids, and a “how many toys in the jar” game. We also did a diaper raffle. For the raffle we gave 1 ticket for every 20 diapers in order to give people more incentive to buy diapers in big bulk packages. We kept the prizes pretty easy and cheap. For the Disney and toy game the prize was a glass water bottle with either a $10 coffee gift card or Target gift card. For the other game we gave them a mini waffle maker that we found at Target. The diaper raffle had a slightly bigger gift, we found a cute metal garden caddy and put a coffee cup, face mask, lotion, body scrub, cute spring sign, and candle in it.
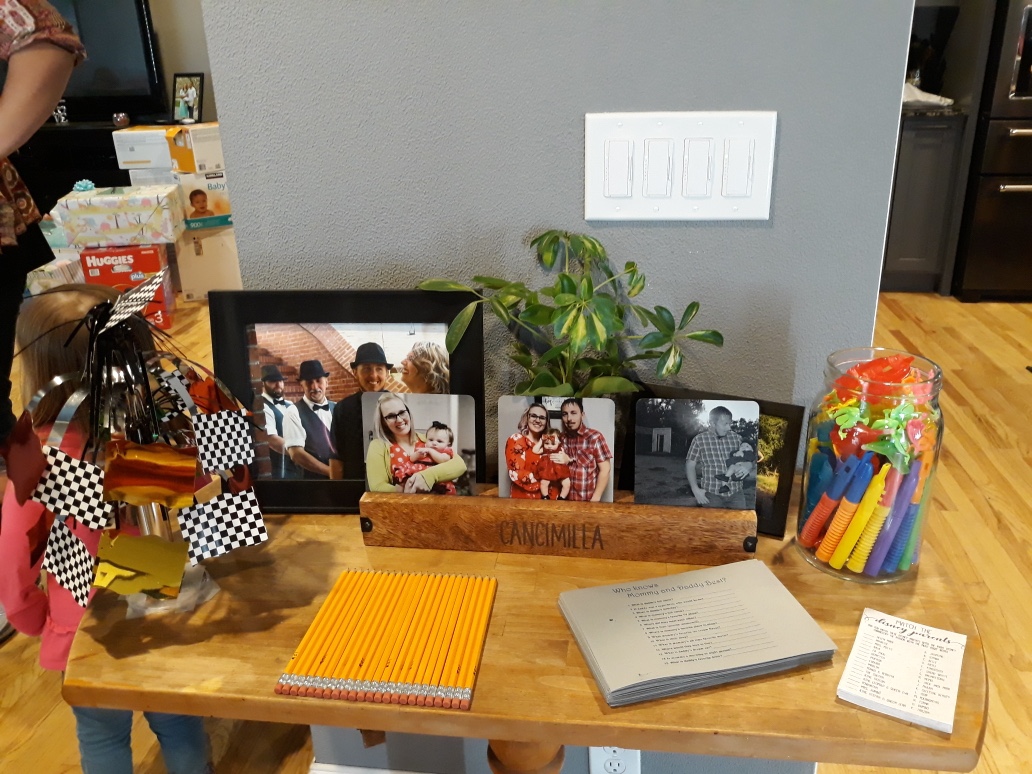
I am also a big fan of having some sort of guest book so later in life our kids can look back and see who came to celebrate them. For our son’s shower we decided to go to Hobby Lobby and get some automotive inspired signs to have people sign that we could then hang in his room as decorations.
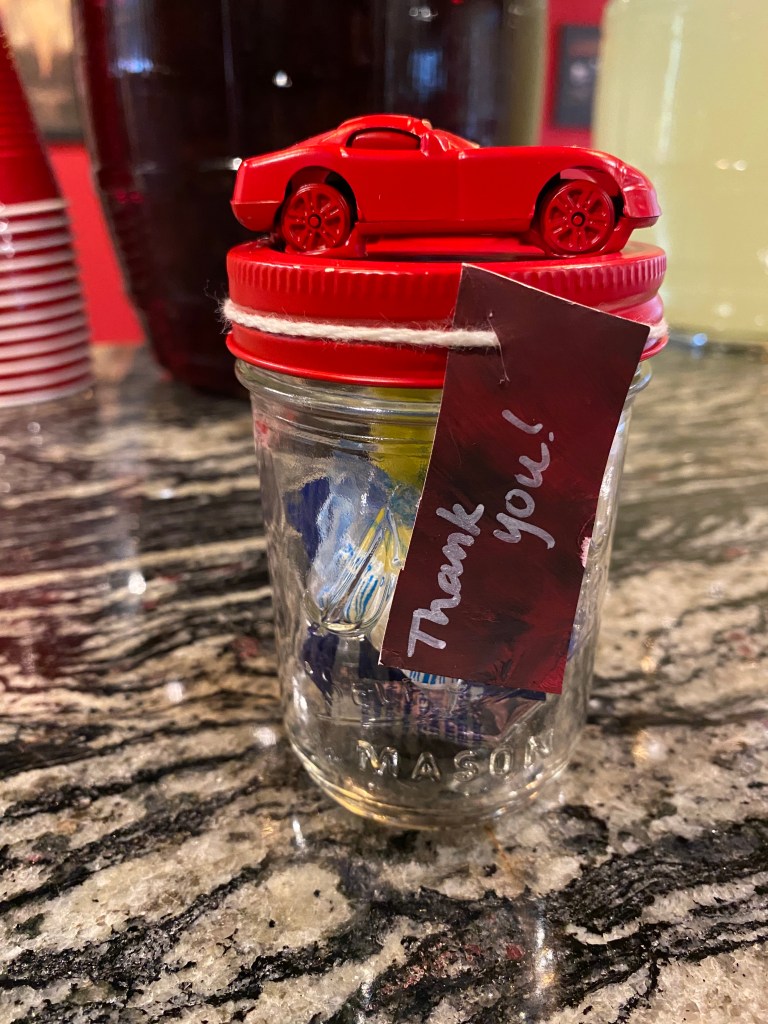
And last but not least, the party favors. I, once again, found the inspiration for these on Pinterest. They were simple but came out so cute. We bought the glass jars that are used for canning and filled them with a mixture of candy. We then hot glued some cheap plastic cars (that we got from Party City) to the lids of the jars then spray painted those and the rims of the jars red. Once everything was dry we put them together. With the help of our daughter I painted some tags and wrote “thank you” on them then used white string to tie them to the jars.
I loved how everything came together. The only thing I regret was having to move the party indoors but that was out of my control. Overall, I think it was a great party and I loved seeing how loved our son already is.

It was an amazing party! Thank you for posting all your ideas and how you put it all together. 💕
LikeLiked by 1 person
Thank you so much! I’m so happy you enjoyed it 💙💙
LikeLike
What an adorable party. Such a sweeet way to celebrate your little guy… congratulations again sweetheart.
LikeLiked by 1 person
Thank you so much 😊
LikeLike